Getting started
Bluobird is a content calendar for X (Twitter). You draft posts yourself or let AI write them, put them on a schedule, and Bluobird publishes them automatically — using your own X and OpenAI API keys, which are stored encrypted and never shared.
A typical setup takes about ten minutes and follows this path:
- 1Create an account — every account starts on the Free plan, no card required.
- 2Open Integrations and connect your X account with its API credentials (see the next section for a walkthrough).
- 3Optionally add your OpenAI key on the same page if you want AI-drafted posts.
- 4Head to Compose to send or schedule a one-off post, or Workflows to put posting on a recurring schedule.
- 5Watch everything from the Queue — every action shows its status, timing, and any errors there.
What Bluobird does — and does not — automate
Connect your X account
Bluobird posts through the official X API using credentials from your own X developer app. You create the app once in the X Developer Portal, then paste four keys into Bluobird.
Step 1 — Create an X developer app
- 1Go to developer.x.com and sign in with the X account you want to post from. The Free tier is enough for posting.
- 2Create a Project, then an App inside it.
- 3In the app's Settings, open User authentication settings and set the app permissions to Read and write. Without write permission, Bluobird cannot post.
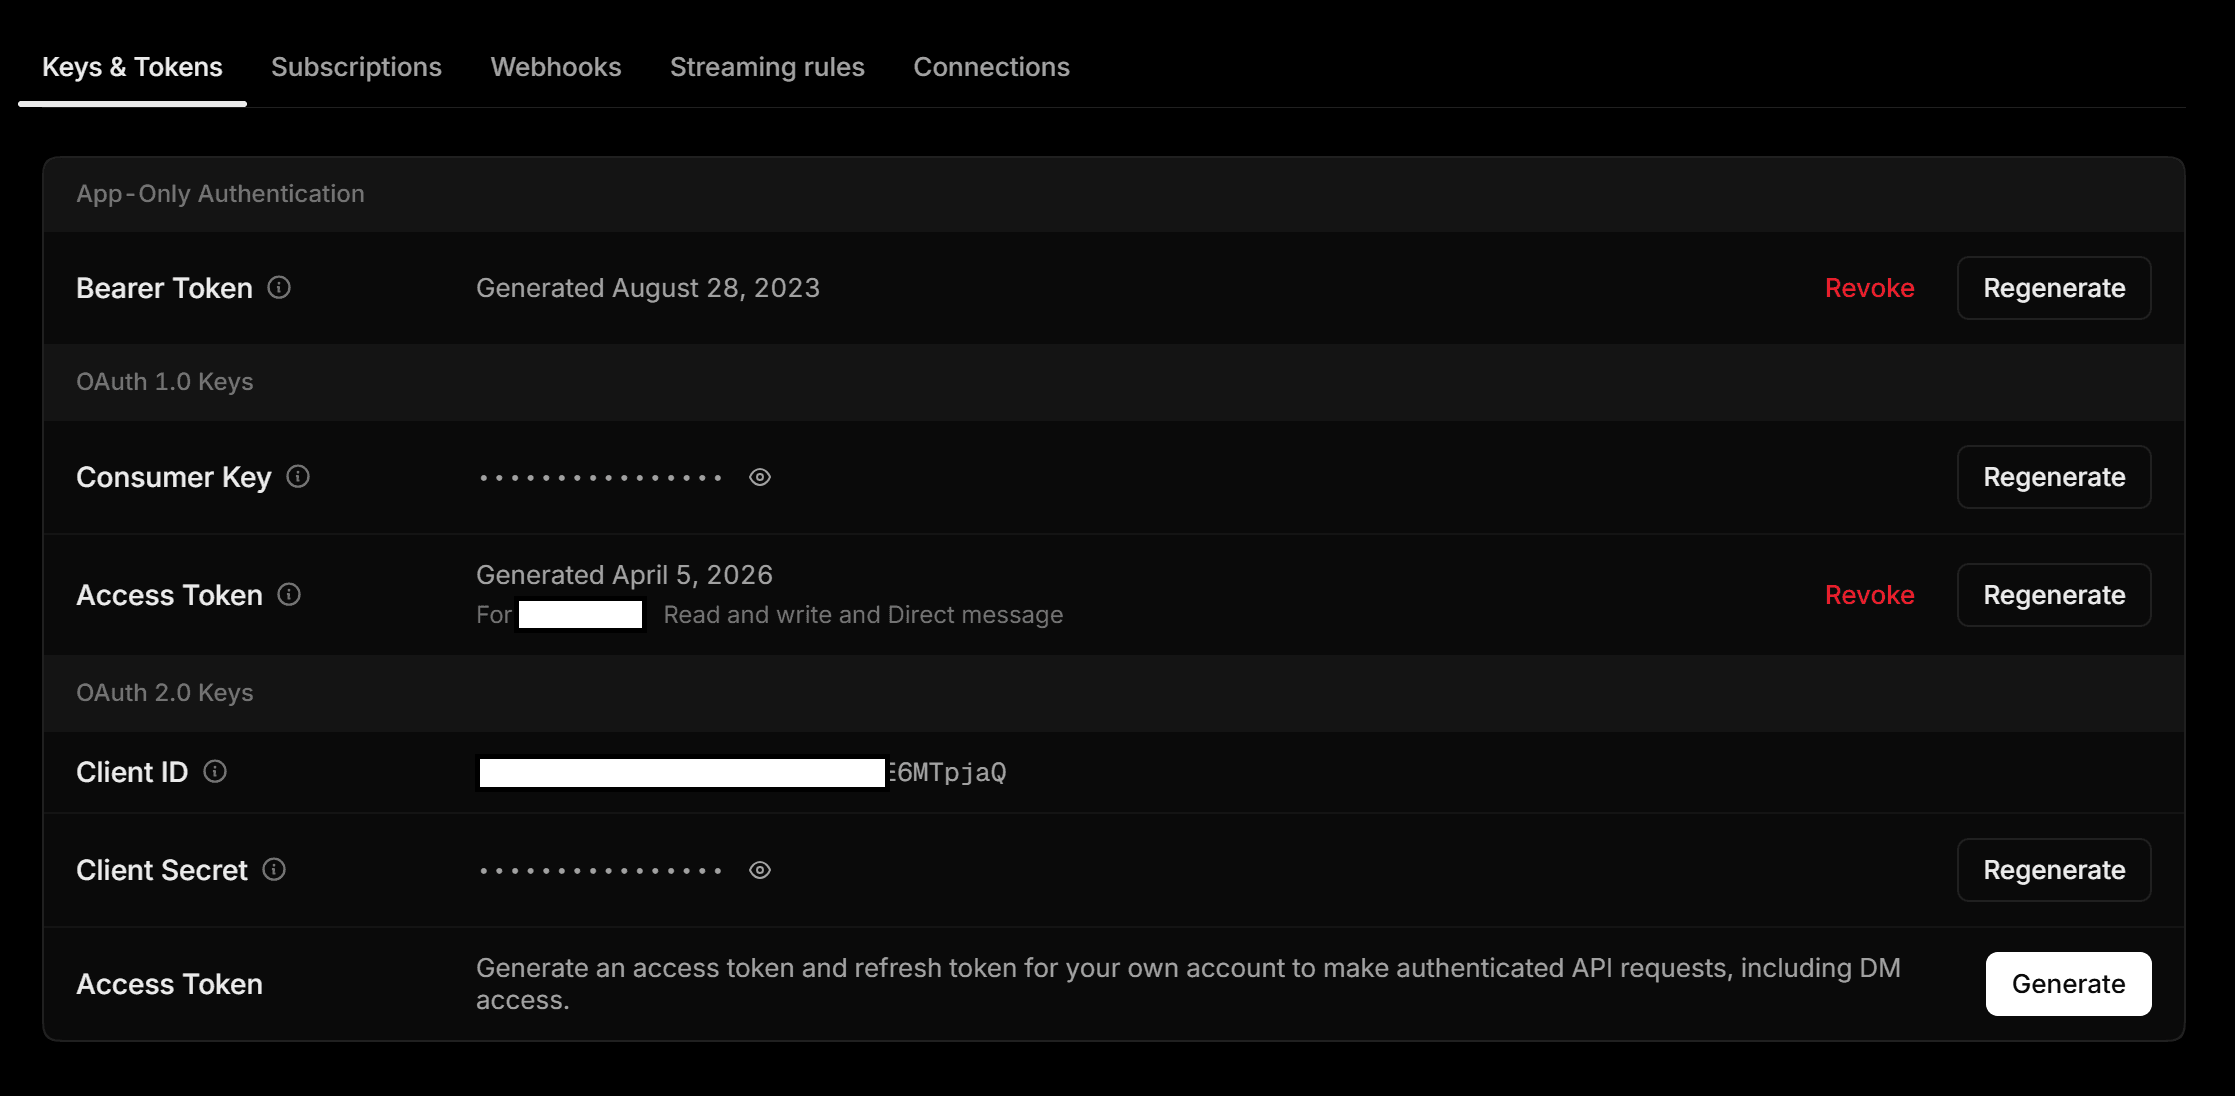
- 4Open the Keys and tokens tab and copy four values: API Key, API Key Secret, Access Token, and Access Token Secret.
Regenerate your Access Token after changing permissions
Step 2 — Add the account in Bluobird
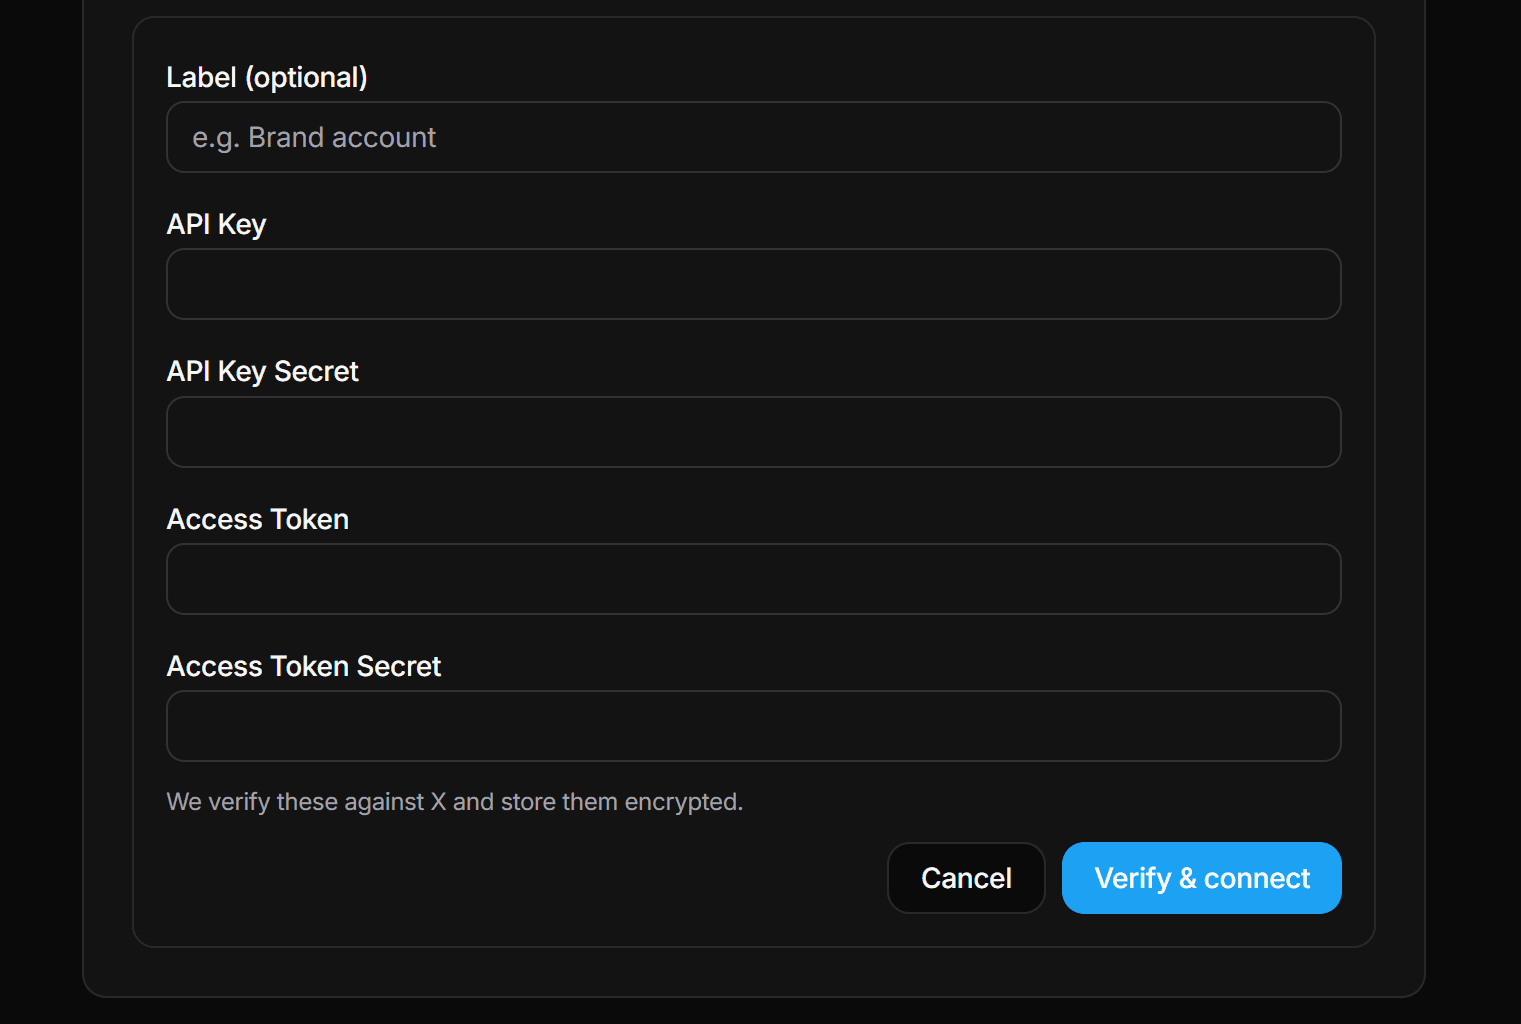
- 1In Bluobird, open Integrations and click Add X account.
- 2Fill in the four key fields. The Label field is optional — use it to tell accounts apart (for example "Brand account").
- 3Click Verify & connect. Bluobird verifies the credentials against X before saving them, and stores them encrypted.
What you should see
- On success you get a Connected @username confirmation and the account appears in your list with a green Verified badge.
- If verification fails you will see Could not connect the account. — almost always a mistyped key or missing write permission. Re-copy all four values and try again.
- You can re-check a connection any time with the Re-test button next to the account.
How many X accounts you can connect depends on your plan — 1 on Free, 2 on Basic, 20 on Pro, and 50 on Ultimate. The counter next to the button shows where you stand.
Add your OpenAI key
An OpenAI key is optional — you only need it for AI-drafted posts. With your own key, AI drafting is unlimited and billed directly by OpenAI at their usual rates.
- 1Create a key at platform.openai.com/api-keys (it starts with sk-).
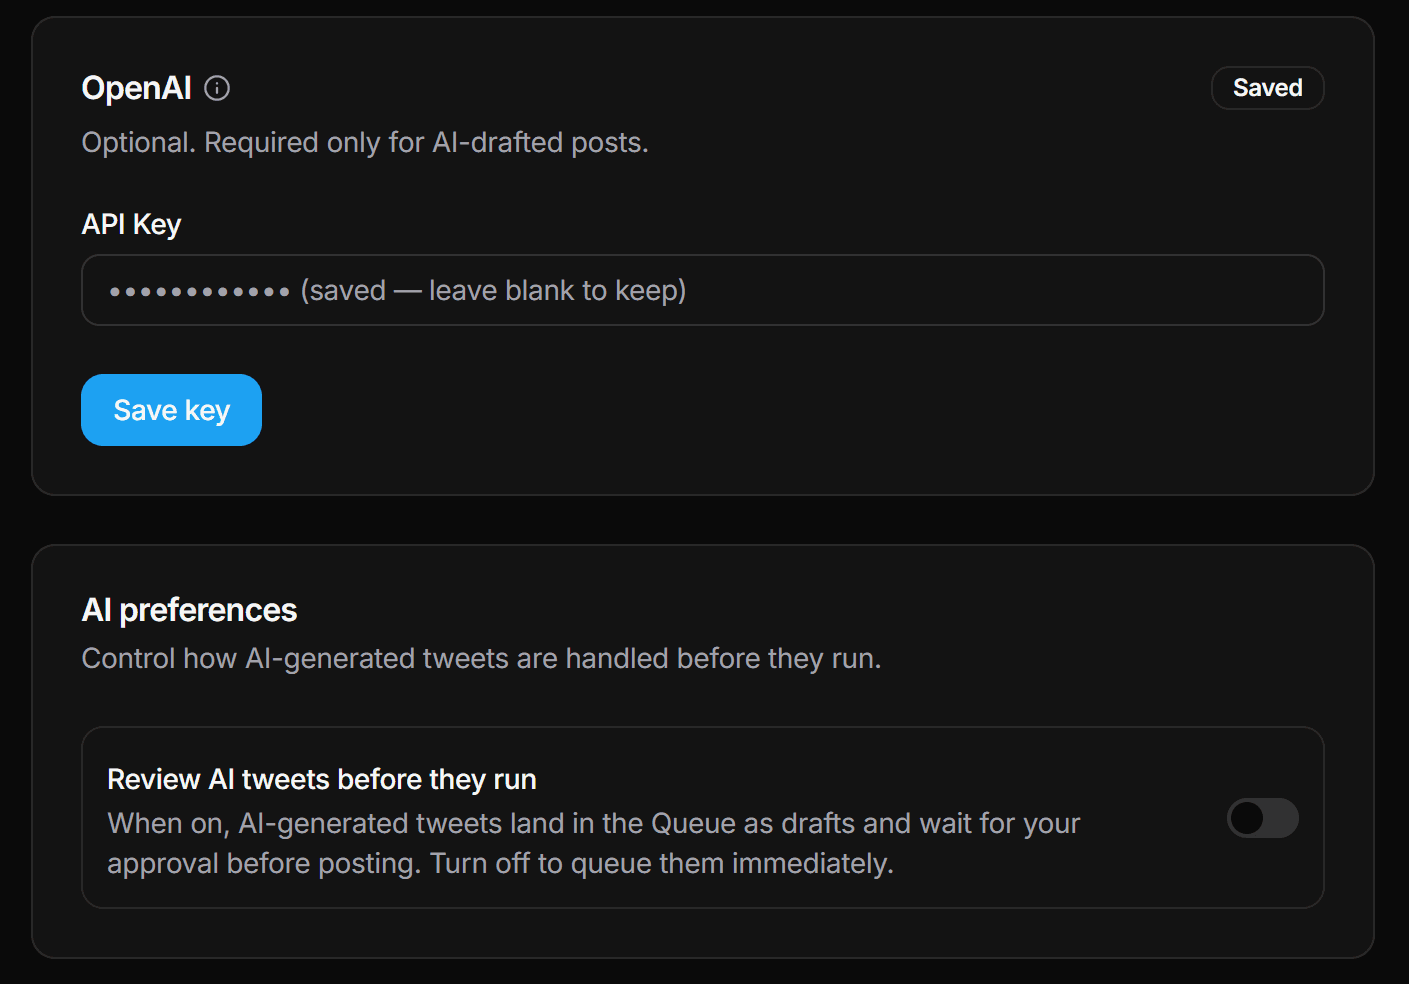
- 2In Integrations, paste it into the API Key field of the OpenAI card and click Save key.
- 3You should see OpenAI key saved. and the field will show a Saved badge from then on. Leave the field blank later to keep the stored key.
No key? AI still works — with a monthly cap
Compose a post
Compose is for one-off actions: write something now, post it now, or schedule it for later. (For recurring content, use Workflows instead.)
Writing the content
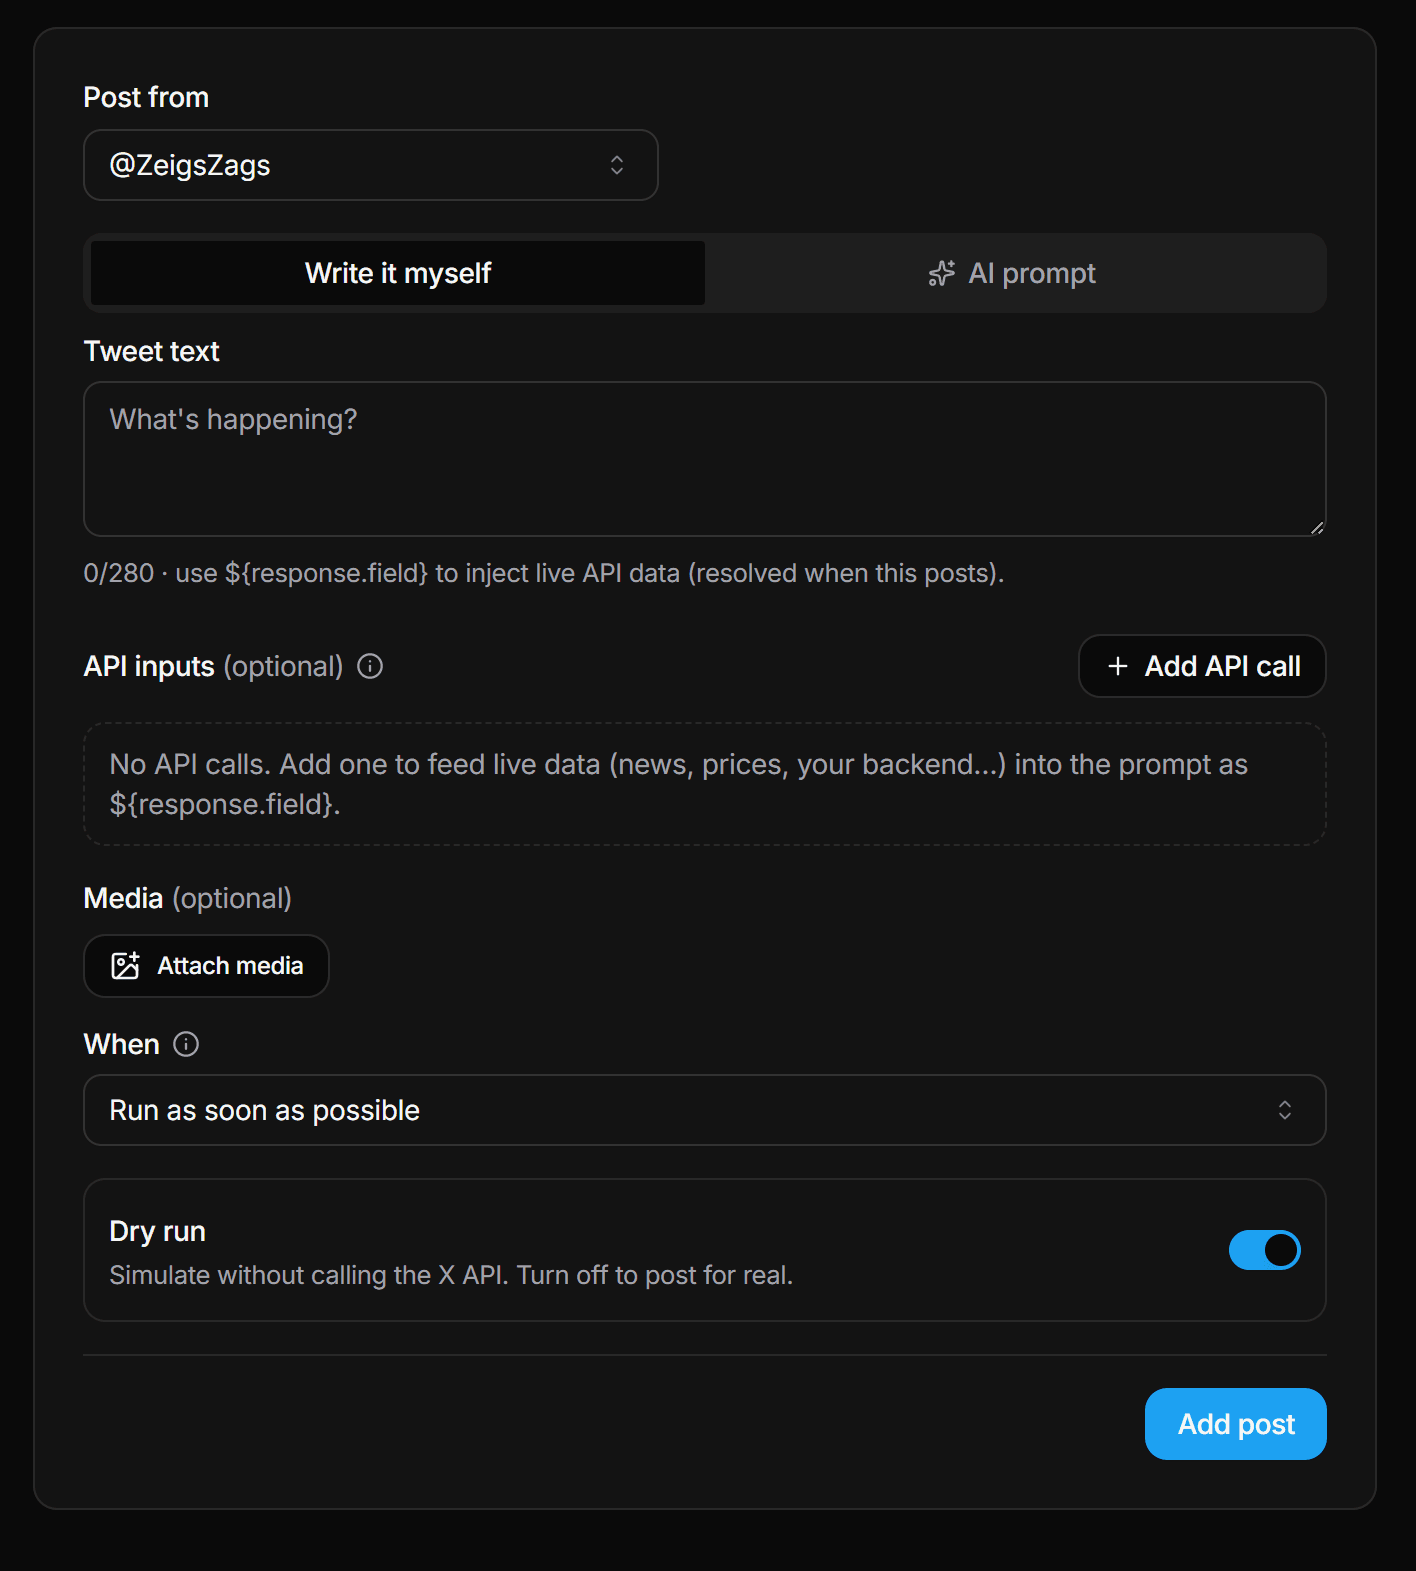
- Write it myself — plain text, up to 280 characters. The counter keeps you honest; going over shows Keep it under 280 characters.
- AI prompt — describe the post you want (for example "A witty tweet about shipping side projects on weekends"). The text is generated fresh at publish time, not when you hit save — so scheduled AI posts stay current.
- Search the web — on paid plans with your own OpenAI key, the AI can search the web before writing so facts are current. Optionally append a cited Source link (X counts any link as 23 characters).
Timing and safety
- Now queues the action immediately; Schedule asks for a date and time.
- Dry run — executes everything except the final publish to X. Use it to preview what a post (especially an AI one) would look like without anything going live. Dry runs do not count against your monthly operations.
- Attach up to 4 items from your Media library per post.
On submit you should see Post added to the queue. — from that moment the Queue page is the single place to track it.
Workflows
A workflow is a recurring schedule that creates and publishes posts for you — the "set it up once, let it publish" part of Bluobird. Create one under Workflows → New workflow. The builder walks you through four steps.
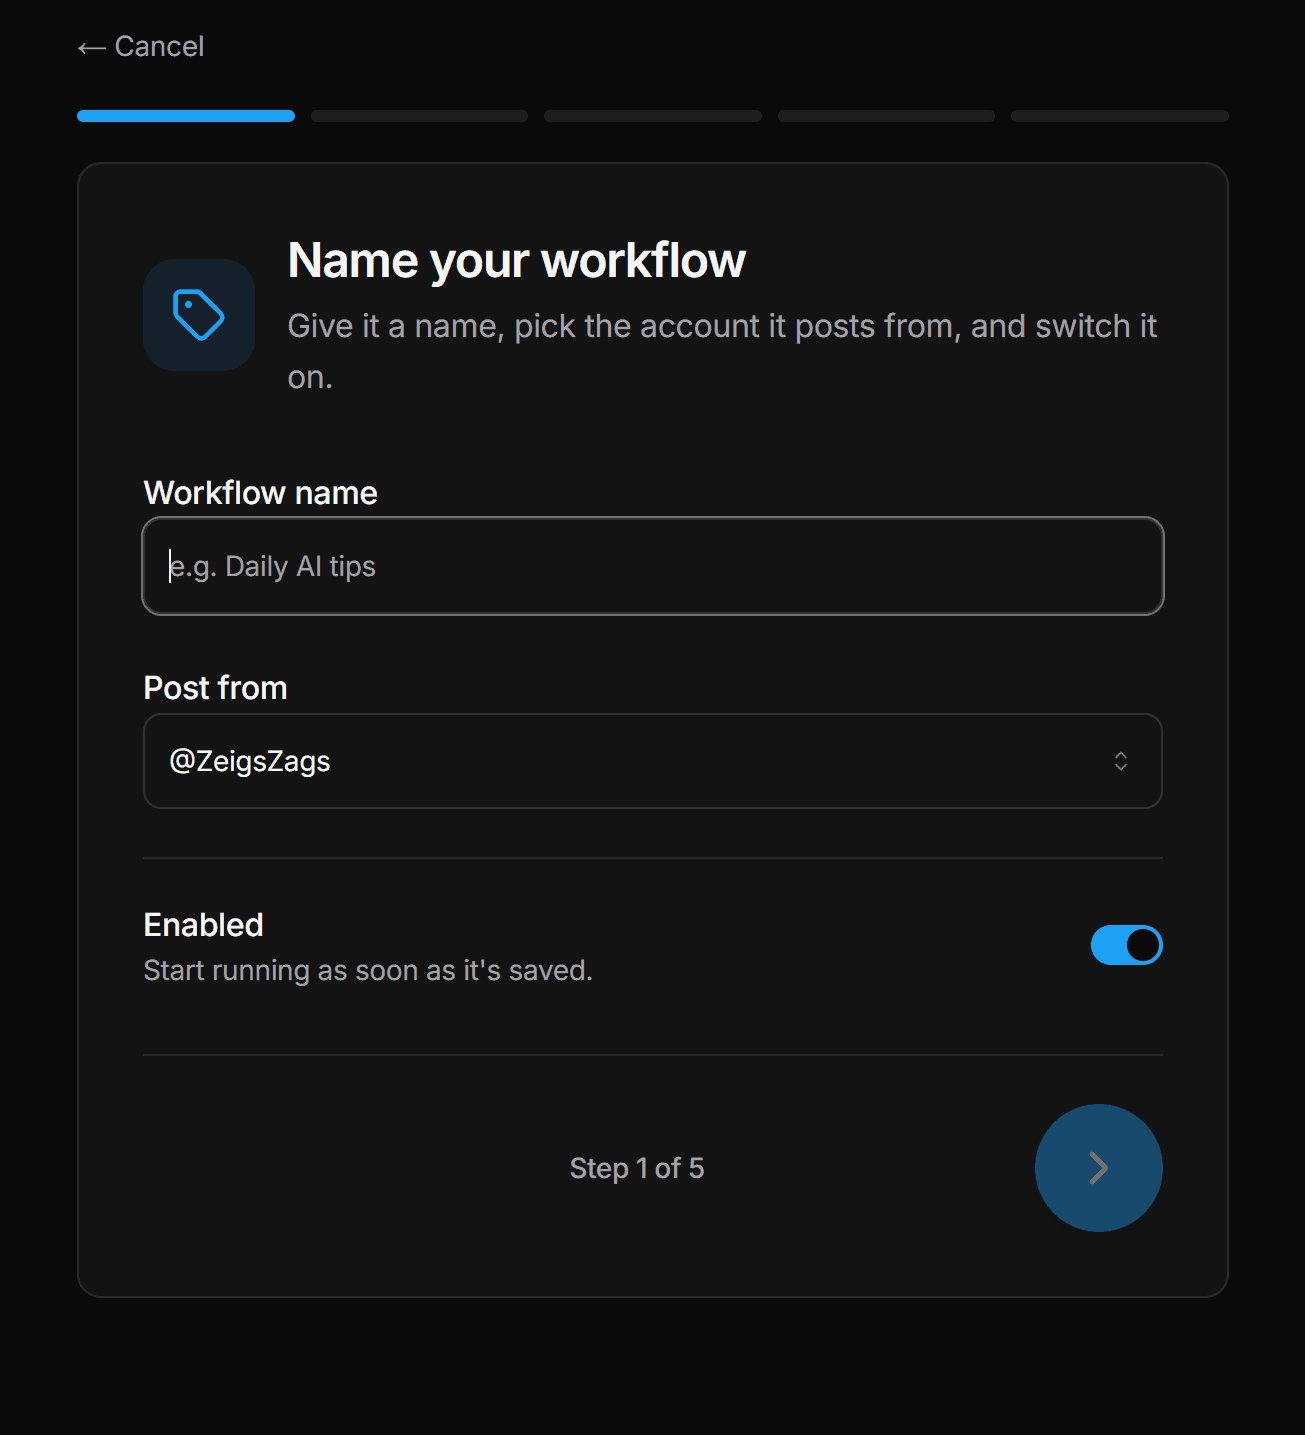
1. Details
- Workflow name — for your own reference.
- Post from — which connected X account publishes.
- Enabled — leave on to start running as soon as you save; turn off to save a draft workflow.
2. Schedule
- Pick Daily, Weekly, Monthly, or Advanced for a full cron expression, plus your timezone.
- Random posting window (schedule jitter) — delays each run by a random 0–N minutes (up to 1440) so posts do not land at the exact same second every day. Recommended: 10–30 minutes.
- Max actions / run — caps how many actions one run may create (1–50). Protects your X rate limits and AI spend.
3. Source — what the workflow works with
| Source | What it does | Best for |
|---|---|---|
| Generate only | AI drafts a fresh post from your prompt on every run. | Daily thought-leadership or niche commentary on autopilot. |
| Dataset | Loops over rows of a CSV dataset you imported — sequentially or at random, optionally filtered. | Product catalogues, tip series, quote libraries, evergreen archives. |
| Search | Searches X by keyword each run and lets rules act on the results (for example a quote post, shown as Spread Narrative). | Joining a conversation around a topic with quote posts. |
4. Rules — what the workflow does
Each rule pairs optional conditions ("field contains X", "likes greater than N" — matched with All or Any logic) with an action. The action content can be manual text, an AI prompt, or rotate through a template dataset. You can also attach media from your library or from dataset image fields, and inject data from external API requests into the text.
Running and managing workflows
- Every workflow card has an enable/disable toggle, a Run now button (confirmed with Workflow will run on the next tick.), a duplicate button, and a run history view.
- Duplicating gives you Workflow duplicated. The copy is paused — edit it to pick an X account. so a copy never posts by accident.
- If saving fails you will see Could not save flow. Check the fields and try again. — usually a missing required field in one of the steps.
Support desk replies
The support desk is a workflow that replies to people who @mention your account — an inbound helpdesk for the folks who reach out to you. It only ever reads your own mentions and only replies to them; it never sends anything to people who did not tag you first.
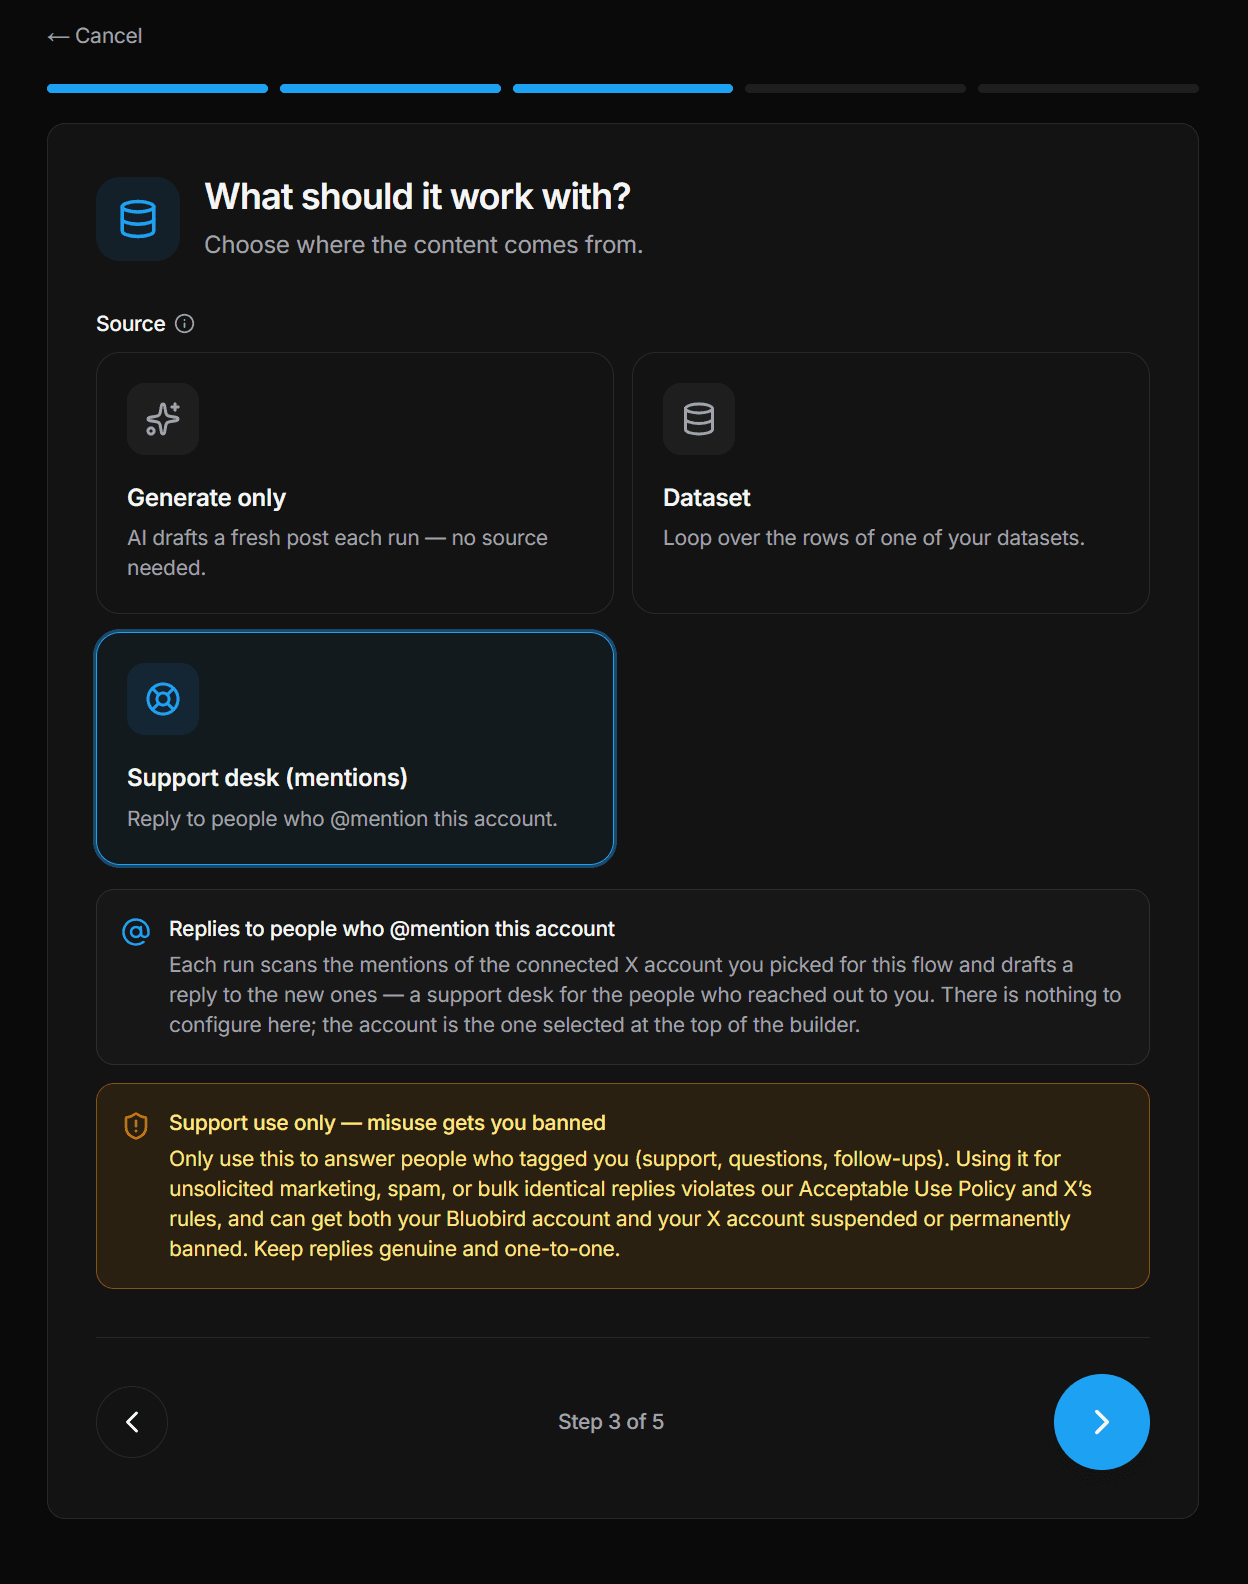
Setting one up
- 1Go to Workflows → New workflow, name it, and under Post from choose the connected X account whose mentions you want to answer.
- 2On the source step, pick Support desk (mentions). There is nothing else to configure — it uses the account you just chose. The only action a support-desk workflow can take is a reply.
- 3On Compose your reply, write the reply yourself or give an AI prompt (see the tip below on referencing the mention).
- 4Set your Schedule (how often it checks for new mentions) and Max actions / run (how many replies one run may send), then launch. Keep Dry-run on for the first run to preview replies before anything posts.
Make the AI actually answer each mention
By default an AI prompt only sees the text you write in it — not the mention it is replying to. To answer what each person actually said, reference the mention with these tokens in your prompt (or in manual text):
| Token | Becomes |
|---|---|
| ${tweet.text} | The text of the mention you're replying to. |
| ${tweet.author} | The @handle of the person who mentioned you. |
| ${tweet.parentText} | The tweet the mention is replying to — usually your own tweet — so the AI has the context of the conversation. Empty if the mention isn't a reply. |
| ${tweet.parentAuthor} | The @handle who posted that parent tweet. |
For example: A user (@${tweet.author}) replied "${tweet.text}" to our tweet "${tweet.parentText}". Write a warm, helpful reply that answers them in that context and offers further help.
Give the AI the conversation, not just the mention
How it behaves
- Each run pulls your most recent mentions and replies only to the new ones — it never replies to the same mention twice.
- It sends at most Max actions / run replies per run, so a burst of mentions can't fan out uncontrollably.
- The first run picks up mentions already sitting in your timeline (not just ones that arrive after you turn it on) — another reason to dry-run it first.
- If you keep AI review on, each reply waits in the Queue as a draft for your approval before it sends; turn review off for fully automatic replies.
Support use only — misuse can get you banned
The queue
Everything Bluobird is about to do — or has done — lives in the Queue: one row per action, whether it came from Compose or a workflow. Filter by Pending, Completed, Failed, or All; search across text, prompts, and usernames; sort by newest, oldest, soonest scheduled, or type.
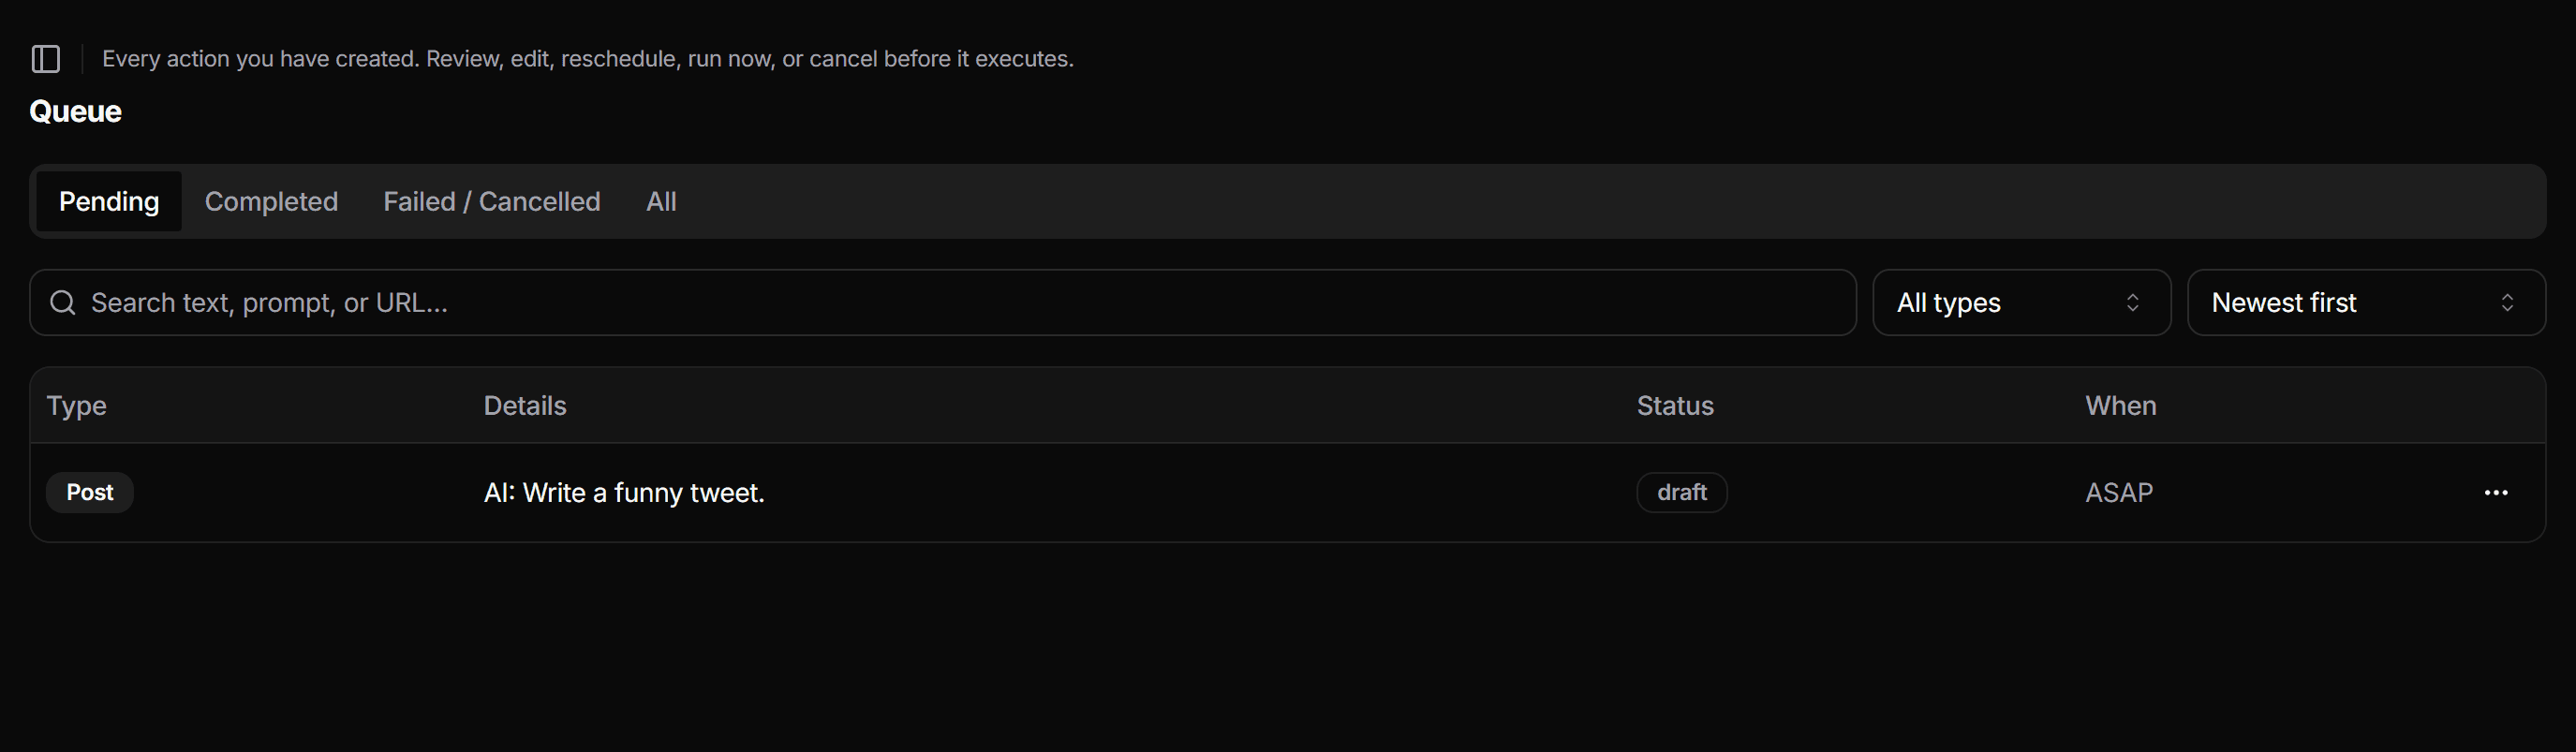
Statuses
| Status | Meaning | Available actions |
|---|---|---|
| draft | AI-drafted action waiting for your approval (only when review mode is on). | Approve · Edit · Cancel · Delete |
| queued | Ready — will execute on the next worker tick. | Edit · Cancel · Delete |
| scheduled | Waiting for its date and time. | Run now · Edit · Cancel · Delete |
| processing | Executing right now. | Delete |
| completed | Published successfully. | Delete |
| failed | Something went wrong — the exact error is shown in red on the row. | Run now · Edit · Delete |
| cancelled | Stopped by you before it ran. | Edit · Delete |
Failed actions are safe to retry
Approving AI drafts
By default, AI-drafted posts publish on schedule without a human in the loop. If you would rather see every AI post before it goes out, turn on review mode.
- 1Open Integrations and find the AI Preferences card.
- 2Enable Review AI tweets before they post.
- 3From now on, AI-drafted actions are held in the queue with the draft status instead of publishing.
- 4Open the Queue, read the generated text, and pick Approve from the row menu — you will see Approved. and the action moves to queued. Not happy with it? Edit the text first, or Cancel it entirely.
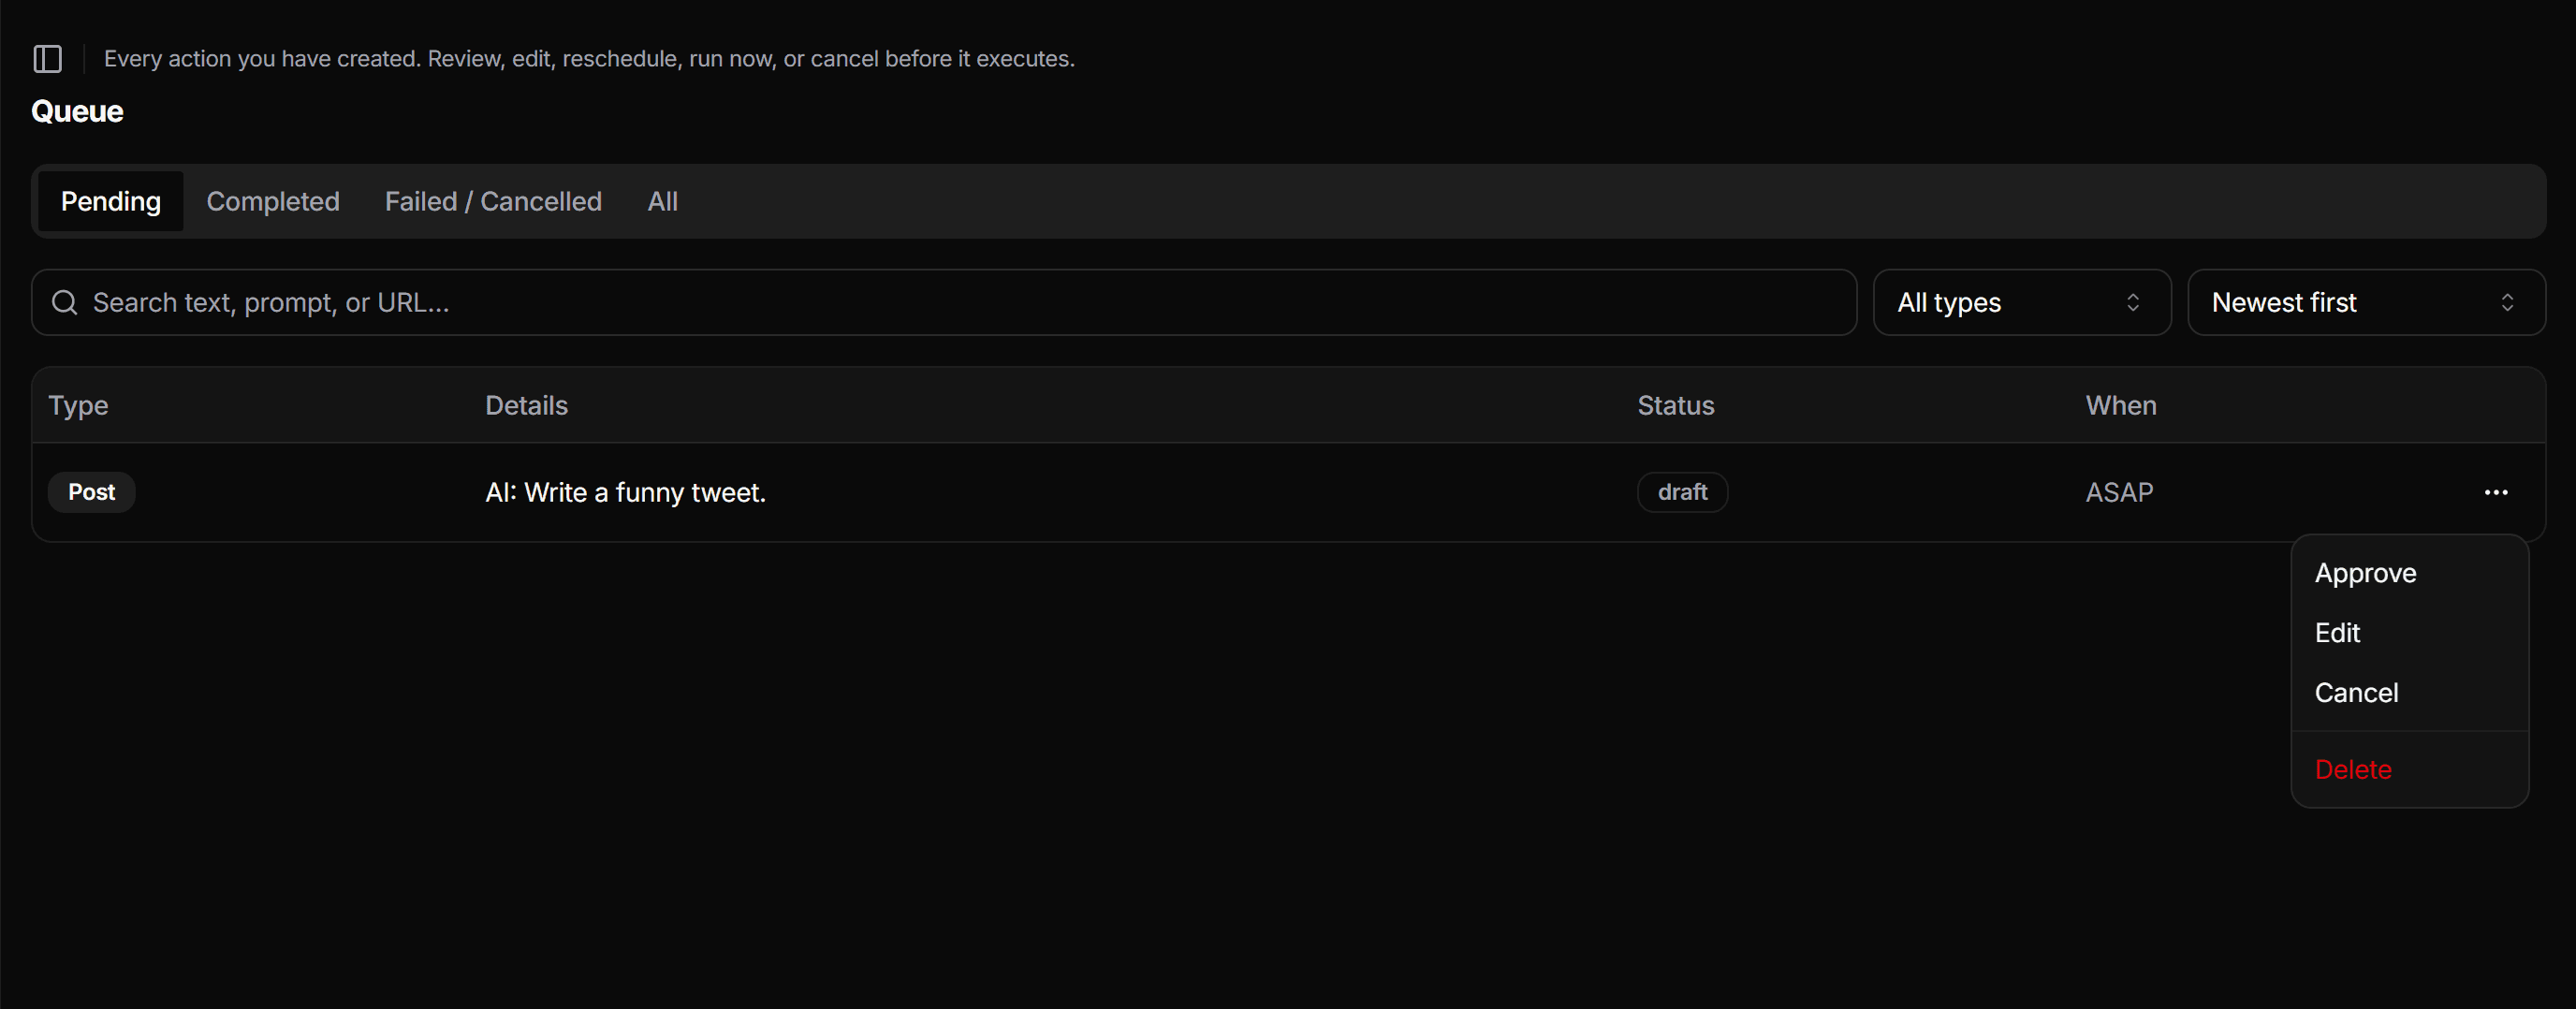
Drafts wait for you
Clearing drafts & how they affect operations
Drafts do not count toward your monthly operations — only published actions do — so a draft backlog never blocks your workflows. It can still clutter the Queue, so there are two ways to clear it:
- Clear all drafts — on the Queue, this button (shown whenever you have drafts) deletes every draft awaiting review in one go. Queued, scheduled, and completed actions are left untouched.
- Auto-purge drafts older than 7 days — a toggle in Integrations → AI preferences. When on, drafts you haven't approved within 7 days are deleted automatically, so you don't have to tidy the Queue by hand. Off by default.
Datasets
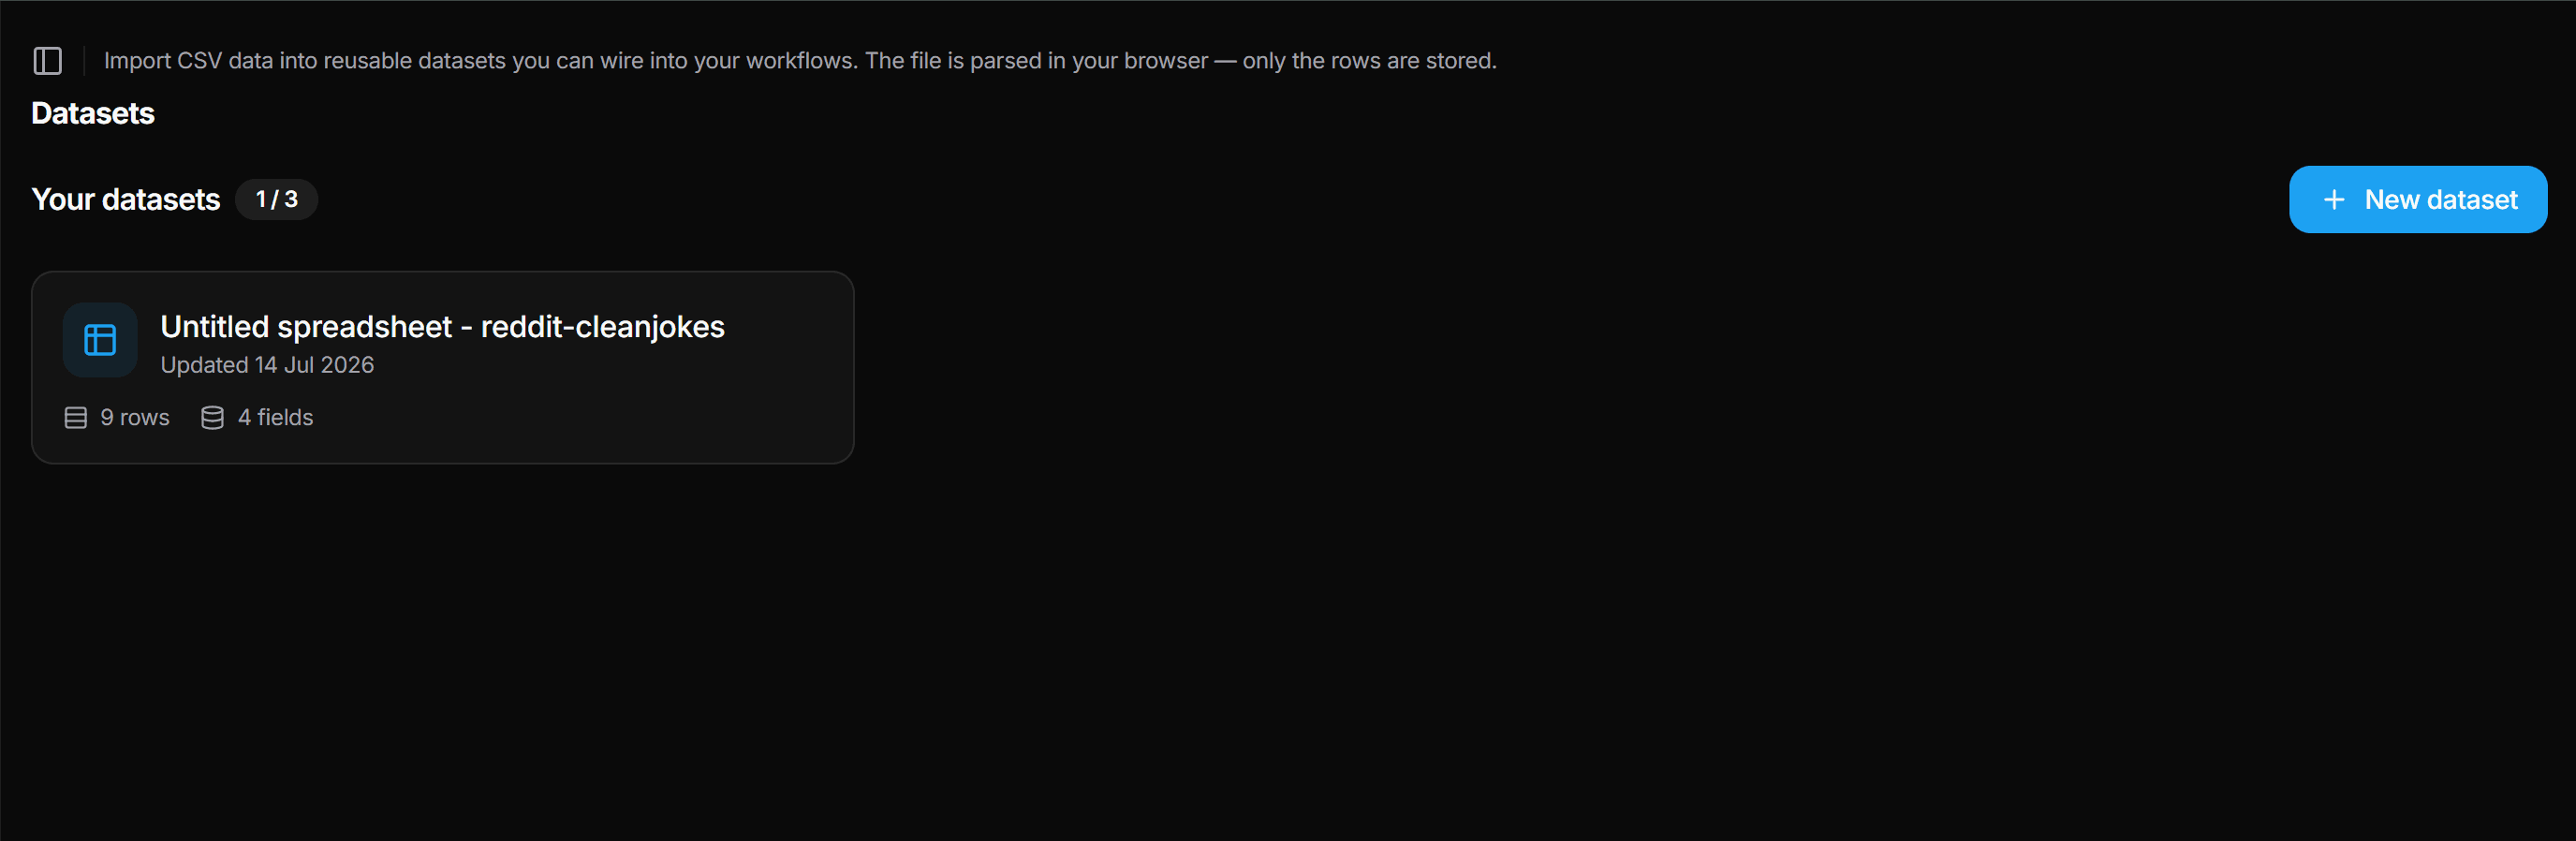
Datasets let workflows post from your own structured content — a CSV of tips, products, quotes, or anything else with one row per post.
Importing a CSV
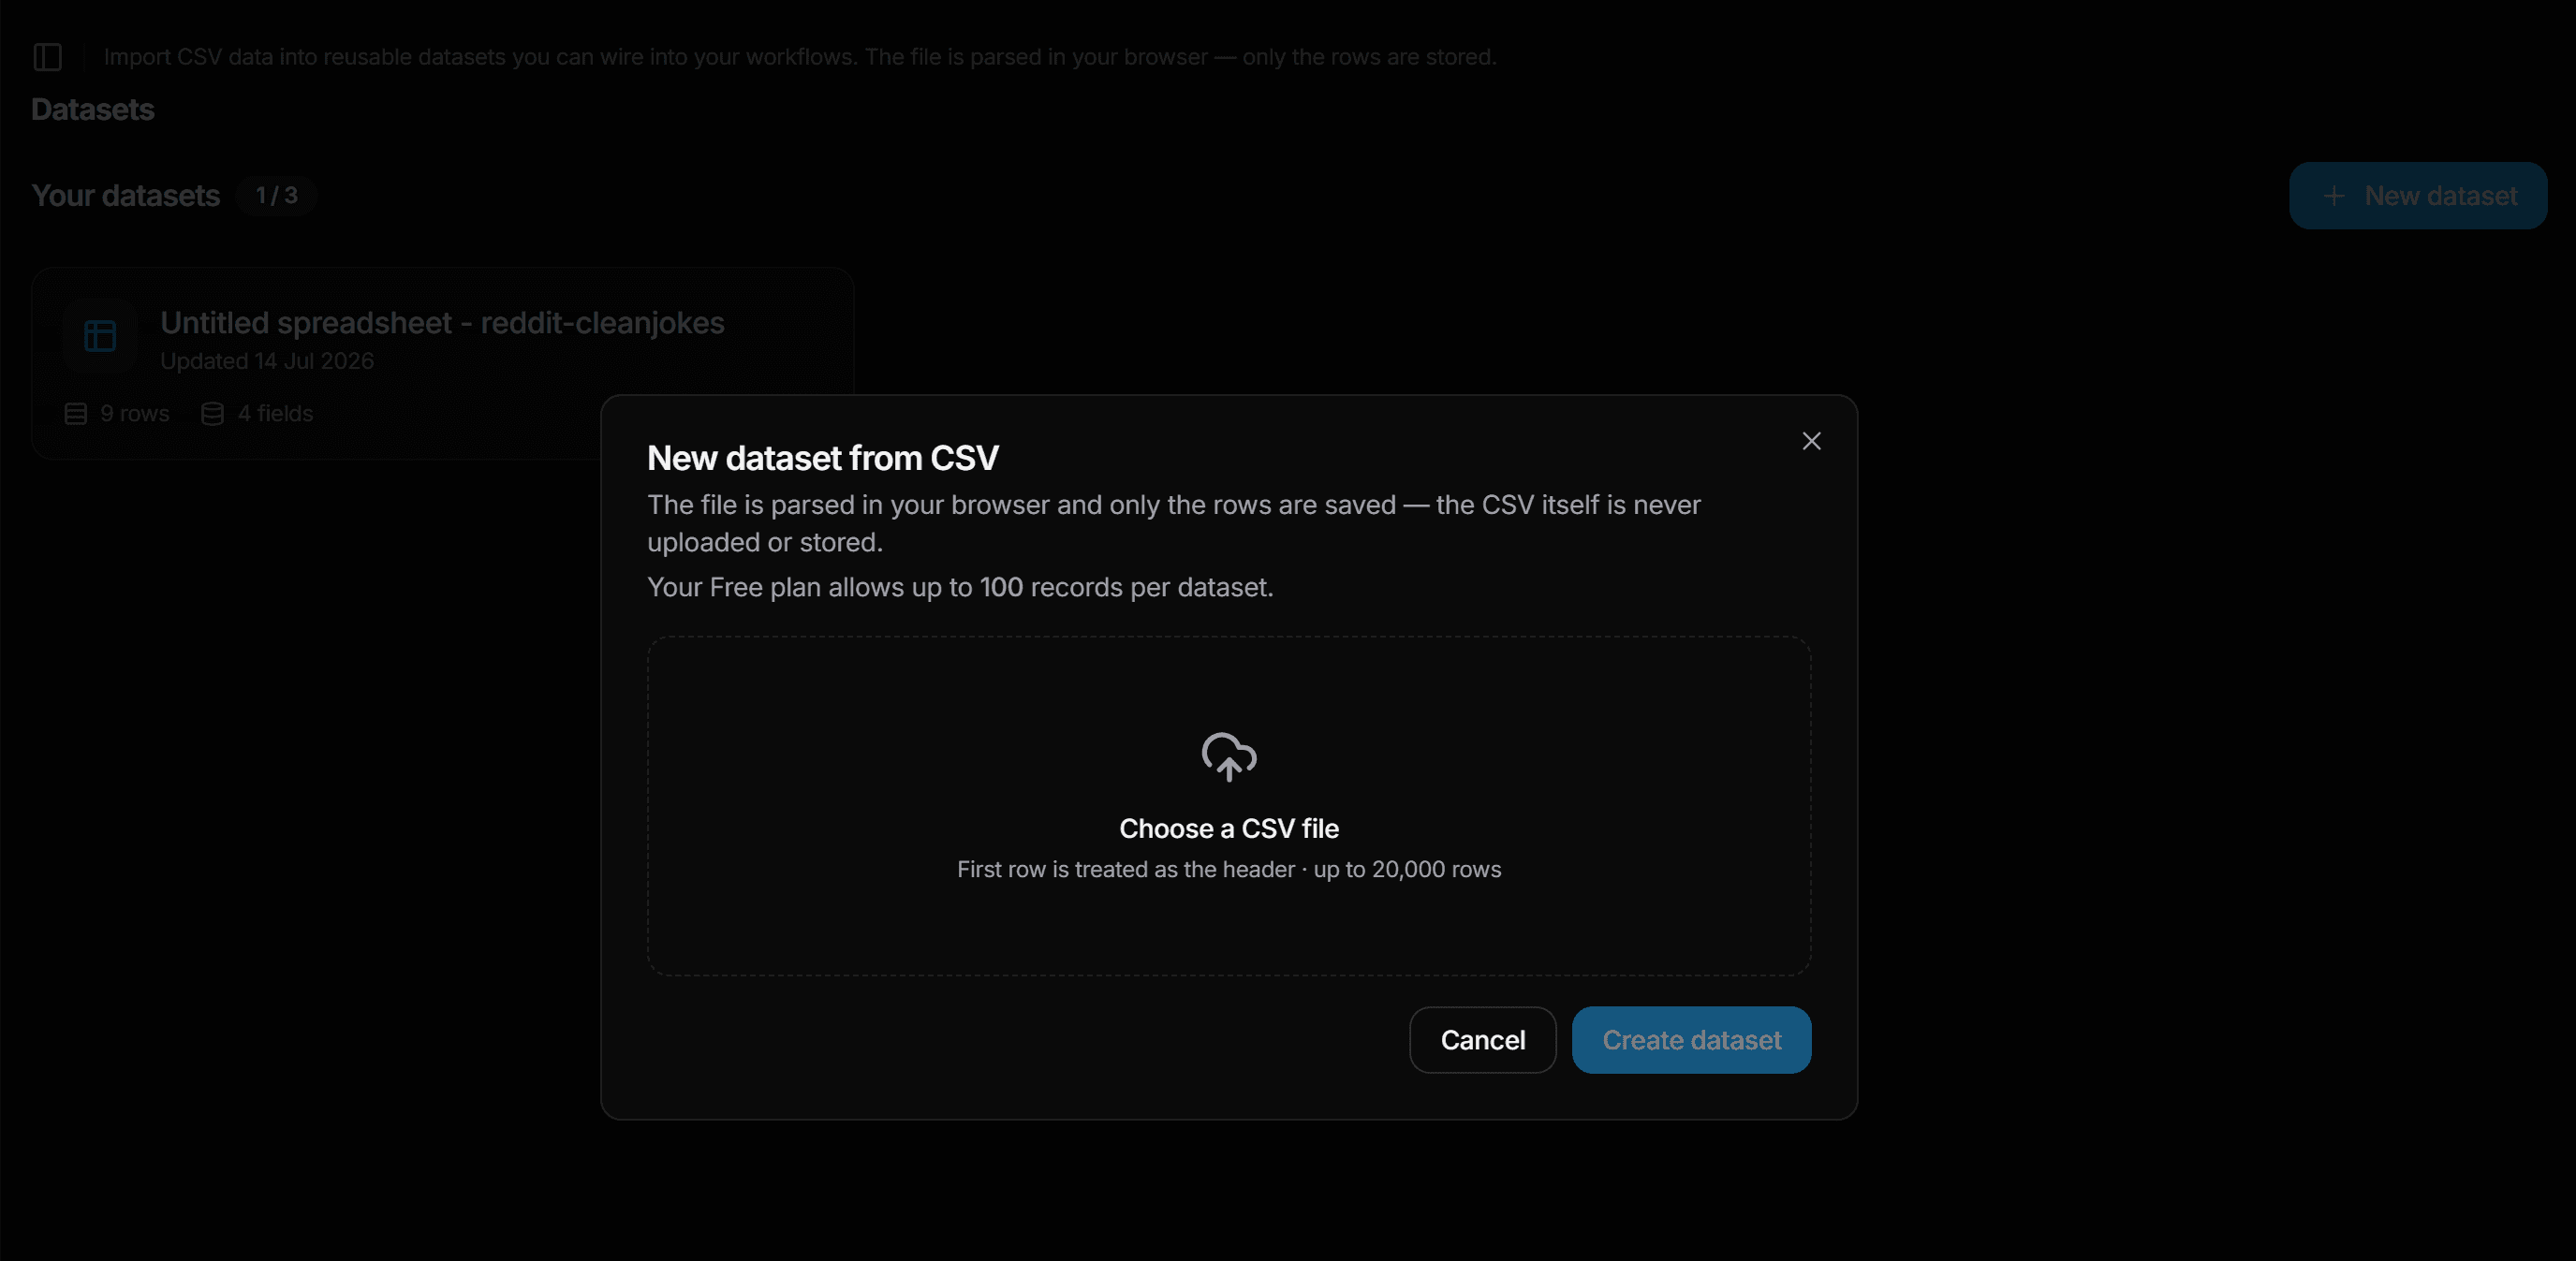
- 1On Datasets, click New dataset and pick (or drag in) a CSV file. The first row must be a header row — column names become dataset fields.
- 2Choose which columns to import and rename their labels if you like.
- 3Give the dataset a name and click Import. Success looks like Imported 120 row(s).
Using a dataset in a workflow
- Pick Dataset as the workflow source, then choose Sequential (top to bottom) or Random row selection, with optional filter conditions.
- A "mark" field tracks which rows have been used, so sequential workflows cycle through the whole dataset without repeats — and you can reset the marks to start over.
- Rows can hold image fields too: upload an image straight into a cell and the workflow attaches it to that row's post.
Limits
- Datasets per account: 3 on Free, 5 on Basic, 10 on Pro, unlimited on Ultimate.
- Rows per dataset: 100 on Free, 1,000 on Basic, 10,000 on Pro, unlimited on Ultimate. Oversized imports are rejected with a message telling you the exact limit.
- Up to 50 fields per dataset.
Common import messages: No columns found. Is this a CSV with a header row? means the file is missing its header line, and That file has headers but no data rows. means only the header was found — check the export from your spreadsheet tool.
Media library
The Media page holds the images and videos your posts attach. Upload with the button or by dragging files in.
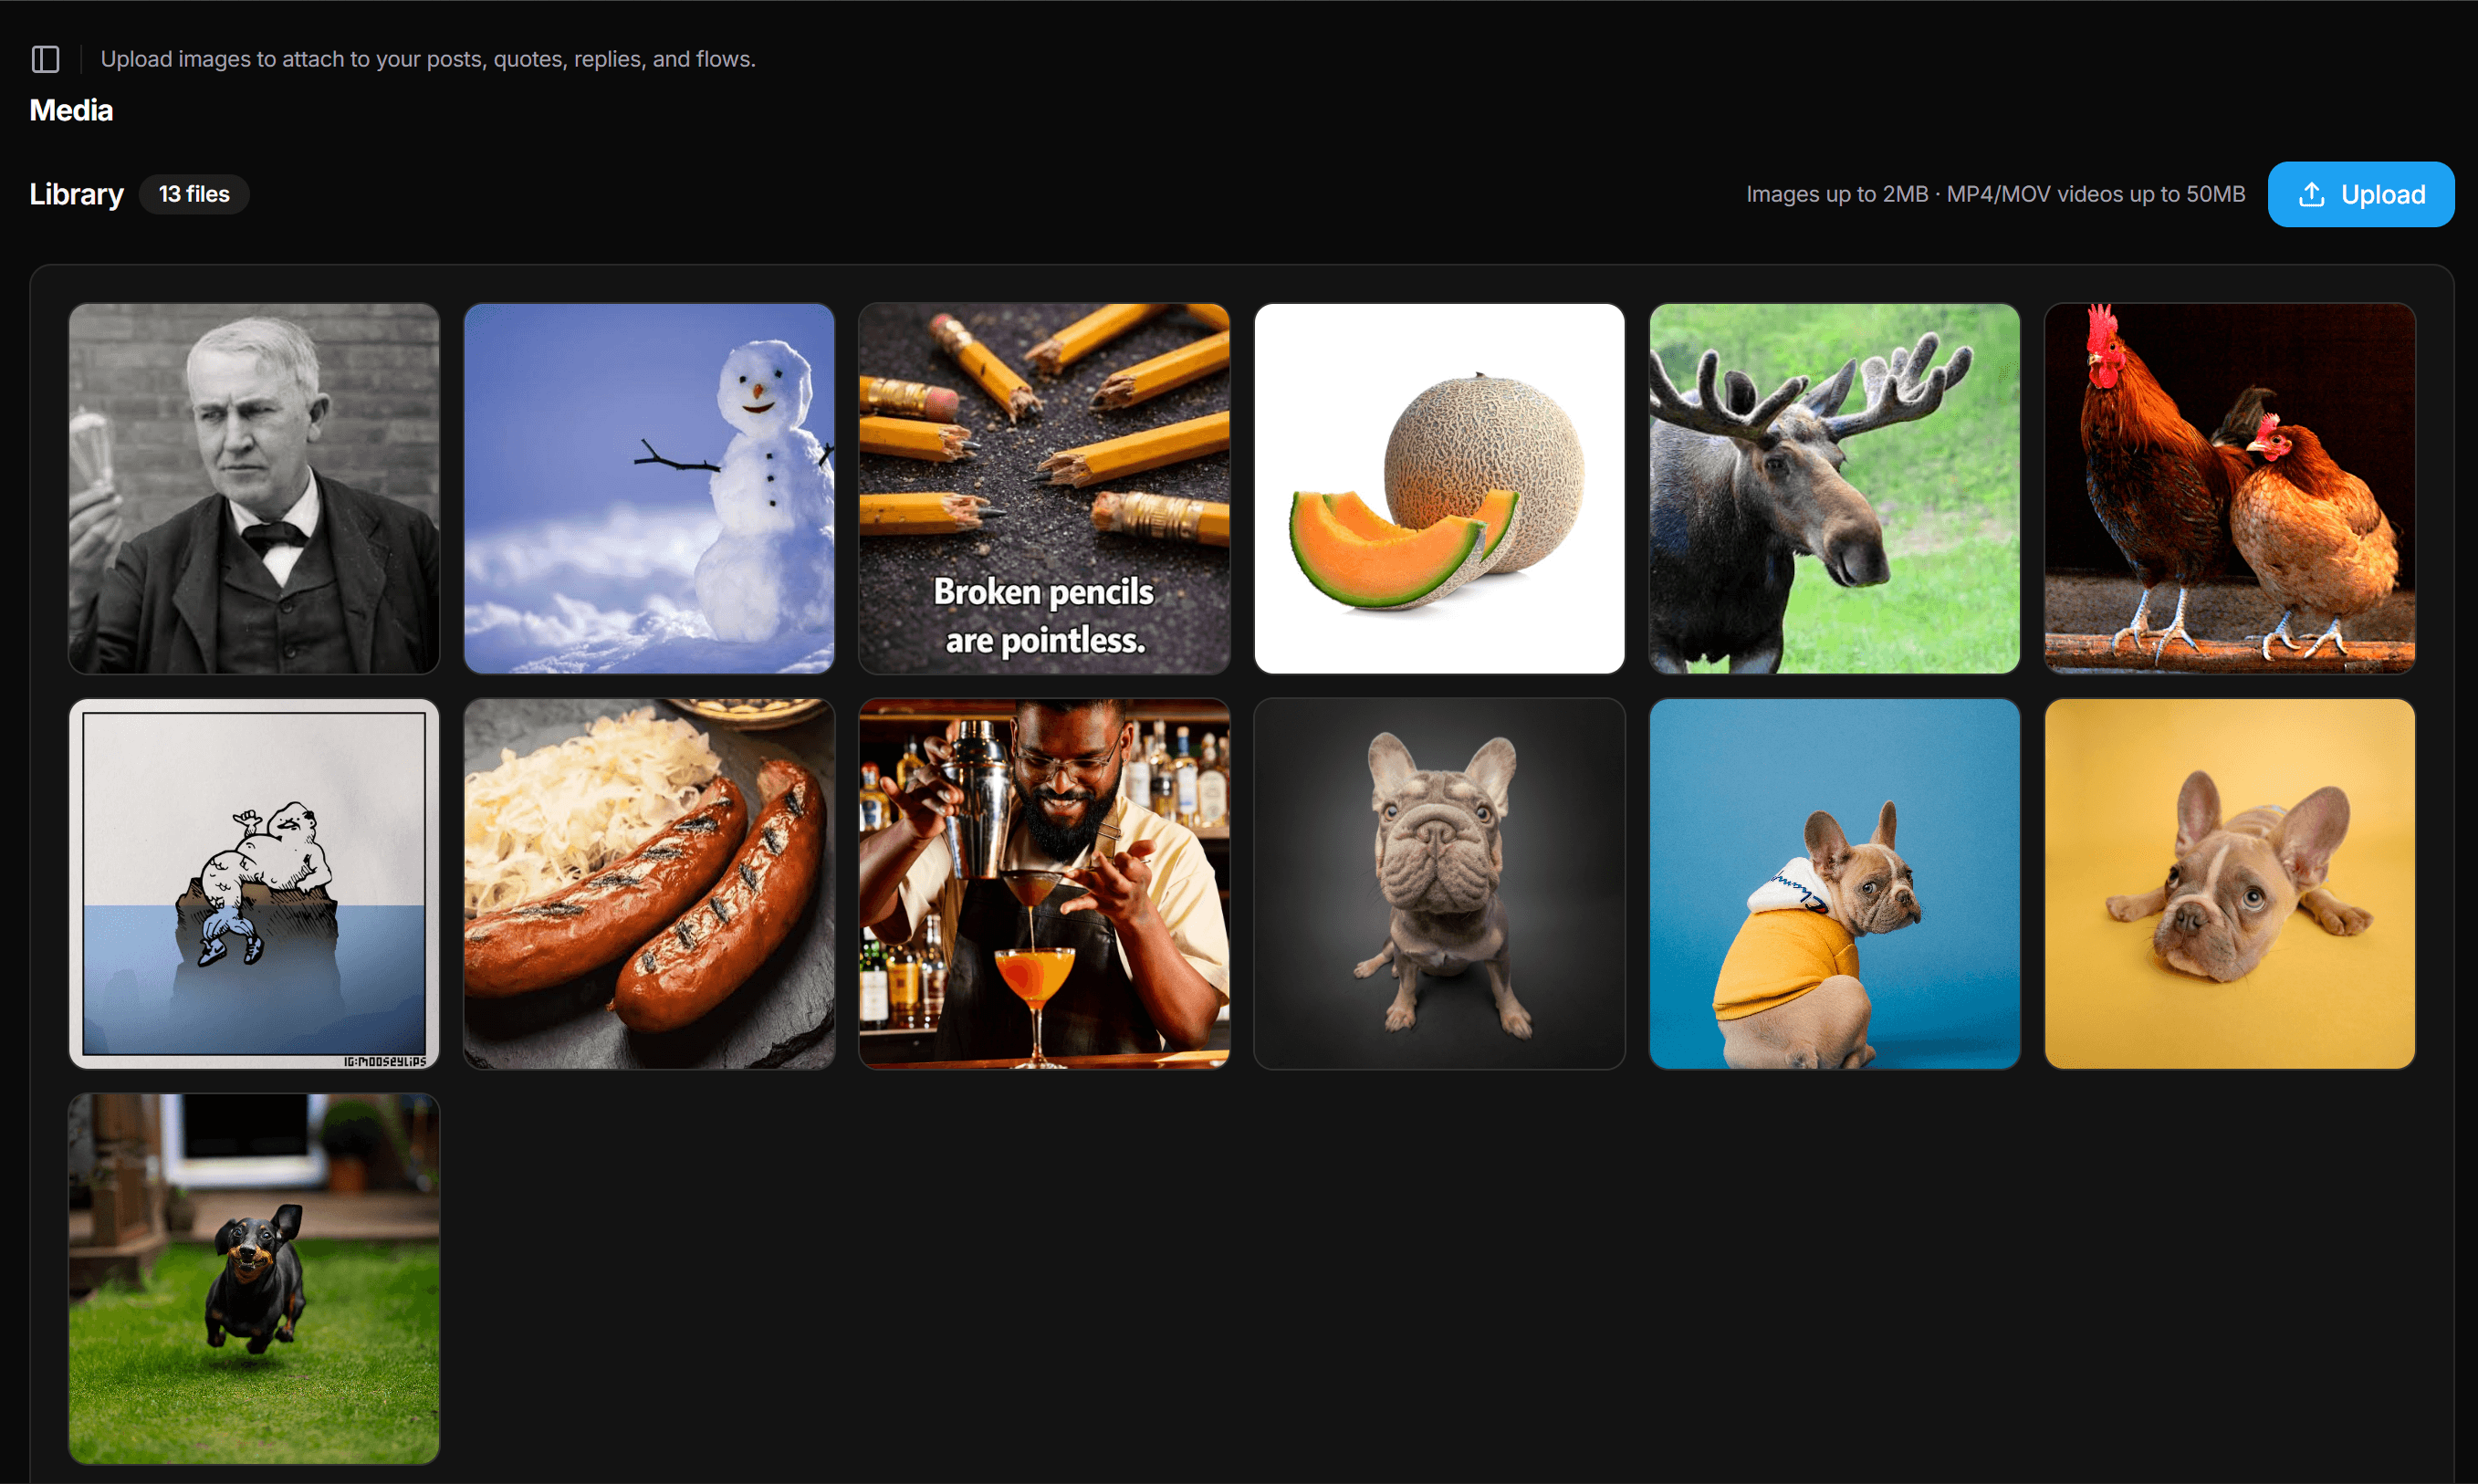
- Images (JPG, PNG, and other common formats): up to 2 MB each.
- Videos (MP4 or MOV): up to 50 MB each.
- A single post can carry up to 4 media items.
Files that break a rule are rejected individually with a specific message — for example photo.jpg is 3.4MB — images must be under 2MB. or clip.avi isn't an image or a supported video (MP4/MOV). The rest of the batch still uploads.
Plans, usage & billing
Bluobird is usage-based: one operation = one executed action (a published post, a quote, and so on). Dry runs are free. Your monthly usage window is anchored to the day you signed up — or the day of your last upgrade — and resets on that same day each month.
| Free | Basic | Pro | Ultimate | |
|---|---|---|---|---|
| Price / month | $0 | $9.99 | $49.99 | $99.99 |
| Operations / month | 10 | 100 | 750 | 2,000 |
| Workflows | 5 | 10 | Unlimited | Unlimited |
| X accounts | 1 | 2 | 20 | 50 |
| Datasets | 3 | 5 | 10 | Unlimited |
| Rows / dataset | 100 | 1,000 | 10,000 | Unlimited |
| Fallback AI drafts | 10 | 50 | 500 | Unlimited |
| AI web search | — | Yes | Yes | Yes |
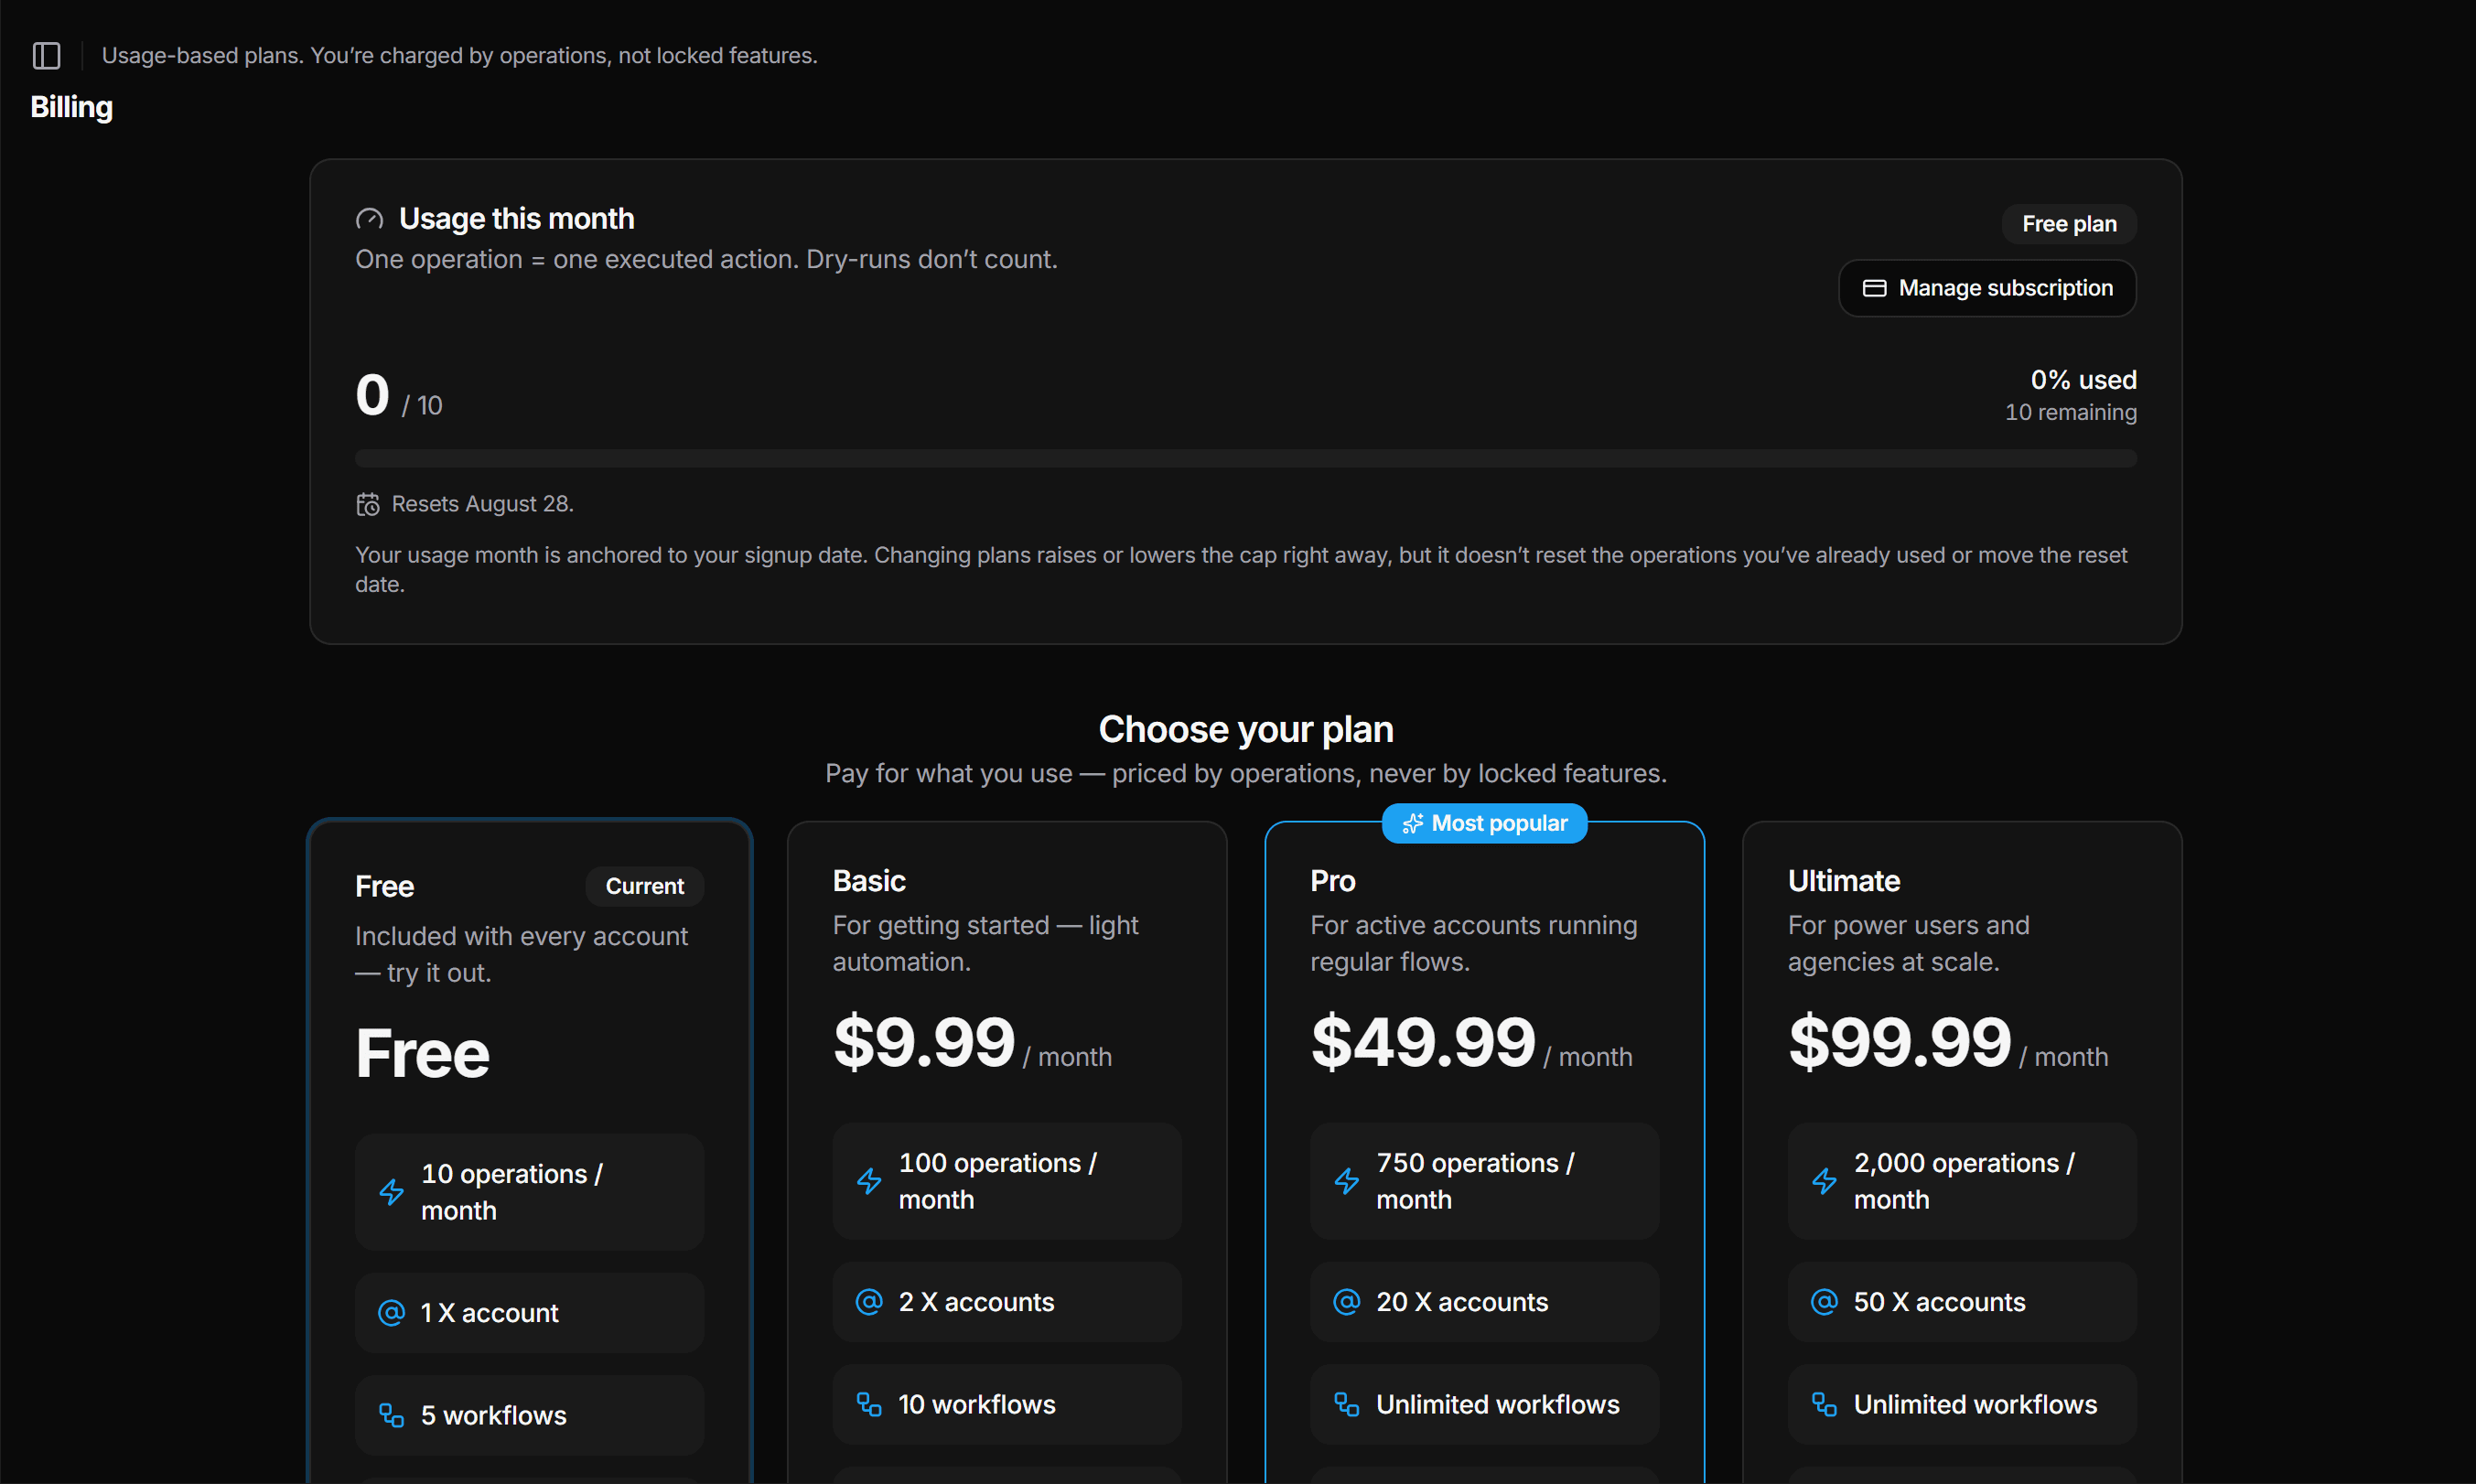
- The Billing page shows a live usage bar (used / limit), your plan details, and upgrade or downgrade options. Payments are handled by Paddle, our Merchant of Record — use Manage subscription to update cards or download invoices.
- Upgrading applies immediately and restarts your usage month that day. Downgrading to Free takes effect at the end of the paid period.
- Only published actions count as operations. AI drafts awaiting review — and posts scheduled for a future month — do not, so they never eat the current month's limit.
- When you hit your operations limit, pending actions wait until your window resets (or you upgrade) — they are queued, not lost.
Troubleshooting
The most common issues, what they mean, and how to fix them. For anything else, contact us — include the exact error text from the queue row if there is one.
| Symptom | Likely cause | Fix |
|---|---|---|
| Could not connect the account. | One of the four X keys is mistyped, or they belong to different apps. | Re-copy all four values from the same app's Keys and tokens tab and try again. |
| Posts fail with a 403 error from X | The access token was generated before the app had "Read and write" permission. | Set permissions to Read and write, regenerate the Access Token and Secret, then update them in Integrations and Re-test. |
| AI posts fail or stop generating | Your OpenAI key is invalid, out of credit, or the fallback allowance ran out. | Check your key and billing on the OpenAI dashboard, or add your own key in Integrations to lift the fallback cap. |
| A queue row says "Waiting" with a retry time | X rate-limited the request — this is temporary. | Nothing to do; Bluobird retries automatically at the shown time. Consider lowering Max actions / run. |
| Keep it under 280 characters | The post text exceeds X's length limit (links count as 23 characters). | Shorten the text, or set a lower max length for AI output in the rule settings. |
| Upload rejected with a size message | Images are capped at 2 MB and videos (MP4/MOV) at 50 MB. | Compress or re-export the file below the cap, then upload again. |
| No columns found. Is this a CSV with a header row? | The CSV is missing a header line or is not comma-separated. | Re-export with headers as plain CSV (UTF-8) and re-import. |
| "You've reached your plan limit…" when adding accounts, flows, or rows | Each plan caps X accounts, workflows, datasets, and rows per dataset. | Remove something you no longer use, or upgrade from the Billing page. |
| Checkout isn't available yet. Try again shortly. | The payment provider took a moment to initialise. | Wait a few seconds and click the plan button again. |
| A workflow is enabled but nothing posts | Usually an empty source (dataset fully cycled, no search results) or the operations limit is reached. | Check the workflow's run history and the Billing usage bar; reset dataset marks if the dataset is exhausted. |
Where to look first